kimchicooking
In this recipe, I show you how to make this Cheesy Vegan Pizza Sandwich. It is really easy to make and perfect if you are craving pizza for lunch.
How to make the Topping for the Vegan Pizza Sandwich?
The topping for this vegan pizza sandwich is really easy to make. Start by cubing 1/2 green and 1/2 red bell pepper and half an onion. Next, mix the onion and bell pepper with the canned corn, olives, and vegan cheese in a bowl. And the topping is ready!

How to make a Crispy Pizza Sandwich?
After we have prepared the topping. We are going to make the pizza sandwich. Put two slices of bread on a plate. Each Pizza Sandwich has 2 slices of bread. Start by spreading vegan butter on one side of a slice. This will become the bottom side of the sandwich. Spread pizza sauce on the other side of the slice. You can make your own pizza sauce or buy one at the store. I made mine with canned tomatoes, Italian herbs, and salt and pepper. Place a few tbsp of the topping on top of the tomato sauce.
-
Spead butter at the bottom of the sandwich -
Spread pizza sauce on the other side -
Topping
Put the second slice of bread on top. And cover the bread with vegan butter. Now both the bottom side and the top side of the sandwich will have a layer of butter. Spreading butter on the outside of the sandwich will help to make the bread extra crispy! Repeat the steps for all sandwiches and grill them in a pan or in a sandwich grill. Make sure you grill both sides if you use a pan.
-
Cover the top with butter -
Grill the sandwiches
After you have grilled the sandwich. Spread a layer of tomato sauce on top of the sandwich. Add a few tbsp of topping and as much vegan cheese as you like. Grill the sandwich in the oven until the cheese has melted.
-
Pizza sauce -
Topping -
Vegan Cheese -
Grill the sandwich in the oven until the cheese has melted.
If you like you can garnish the sandwich with a swirl of BBQ sauce.
Enjoy!
Vegan Pizza Sandwich
Print
Ingredients
Instructions
In this recipe, I’ll show you how to make this delicious vegan cream tart. Perfect for birthdays and other festive events. With this cake, you’ll definitely impress all your guests. And it’s actually not as hard to make as it looks.
How to make the pastry for the vegan cream tart?
To make the pastry put the all-purpose flour, powdered sugar, vanilla essence, vegan butter, and a pinch of salt in a bowl. Make sure the butter is at room temperature and cut in smaller cubes. This will make it easier to knead the dough.
If you like you can mix the ingredients first with a spoon and start kneading when the butter has dissolved a little. This will make the kneading less messy. You can also use a food processor to knead the dough. Knead until the ingredients are well combined and you can make a ball.
Place the ball in the refrigerator for 30 minutes.
All-purpose flour Powdered Sugar Vegan Butter at room temperature Pinch of salt Vanilla essence Knead and refrigerate for 30 min
How to roll the dough for the vegan Cream Tart?
After 30 minutes take the ball out of the refrigerator and split the ball into 2 parts. Each part will be one layer for the cake. We’re going to roll the dough into a circle shape with a hole in the middle to make the cake look pretty. But you cal also make a different shape. A heart for example for valentine’s day.
After you’ve split the dough proceed to roll one of the halves into a ball. Make sure you place the dough on parchment paper, otherwise it will be very difficult to transfer the dough to a baking tray after you’ve made the circle shape.
Split into 2 parts Roll one half into a ball
Flatten the ball and keep the shape as round as possible. This will help to roll the dough into a circle. Next, roll the dough into a circle. Make sure the dough is 3-4mm thick and roll the dough into different directions to stretch the dough evenly. Put cling film over the dough to prevent the dough roller from sticking to the dough.
Flatten and shape the dough into a circle Roll the dough into a circle (3-4mm thick)
To make a perfect circle we’re going to cut the dough with a round shape with a diameter of 24cm. I’ve used a cake tin to cut the circle. But you can for example also use a large bowl. Just place the cake tin or bowl on top of de dough and press to cut the dough. Next, remove the excess dough and clean the edges.
Cut the dough with circle shaped object (24cm) Clean edges
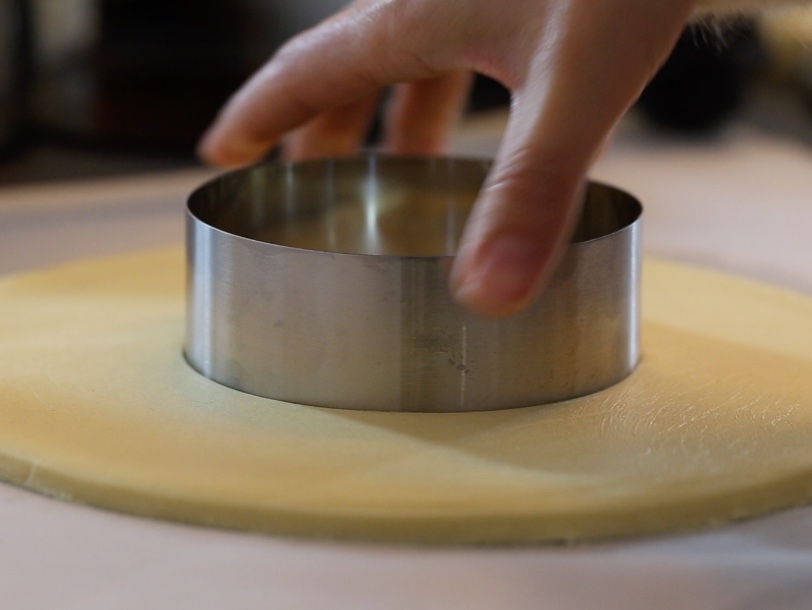
Next, we’re going to cut a circle in the middle. You can use a cooking ring as I did or a small bowl. Preferably with a diameter between 11-12 cm. Press the object into the dough to cut the circle. And remove the excess dough from the middle. You can use the leftover dough to make cookies.
Place the circle on a baking tray and refrigerate while you make the second circle. The second circle has to be exactly the same as the first one. Just repeat all the steps. And check if you cut the circle in the middle at the same spot as you did for the first circle. Also, refrigerate the second circle if the oven isn’t at the right temperature yet.
Cut a smaller circle (11-12cm) Remove excess Refrigerate
How to bake the dough for the Vegan Cream Tart?
Preheat the oven at 180°C and bake both circles for 20-25 minutes. The pastry is done when the color has turned slightly browner and the dough feels firm. Make sure you don’t keep the dough in the oven for too long because the taste will not be as good. The pastry will have a cookie texture and will become more crispy after it cools.
Let the dough cool off completely before you pipe the filling.
Bake 20-25 min at 180°C
How to make the frosting for the vegan Cream Tart?
For the filling, you’ll need vegan cream cheese, powdered sugar, vanilla essence, and vegan whipping cream. You can buy the vegan cream cheese and vegan whipping cream or make it yourself. I decided the make a vegan cream cheese with soy yogurt and buy a soy whipping cream. But you can make a vegan cream cheese with any plant-based yogurt. And a whipping cream with coconut milk.
The vegan cream cheese was really easy to make. Just put the plant-based yogurt in a strainer with a clean towel or cheesecloth. Place the strainer in a bowl and let the plant-based yogurt drain for 18 hours. There will be a lot of water in the bowl and your plant-based yogurt will have turned into a much firmer substance.
Drain Plant-Based Yogurt After 18 hourts The result
Put the vegan cream cheese and powdered sugar in a bowl and mix.
Vegan cream cheese Powdered sugar Mix
Whip the vegan whipping cream in a separate bowl and add vanilla essence.
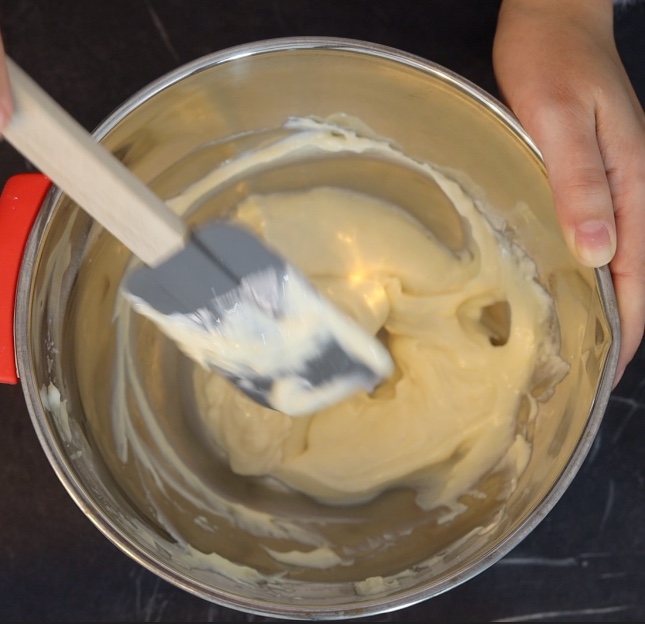
Fold the whipped cream in two parts into the cream cheese mixture.
How to pipe the filling for the vegan Cream Tart?
The pastry and the filling are ready. Now we only have to pipe the filling and decorate the cake in any way you like. To pipe the filling you have to use a piping bag.
Before you start filling the cream tart I recommend placing the pastry for the bottom on a pretty plate. This way you won’t have to replace the Cream Tart anymore after filling. The pastry is delicate and it will be difficult to replace after you’ve added the frosting.
Also, if you’ve never used a piping bag I recommend practicing a little first. You can practice on a clean plate or on parchment paper. You can re-use the frosting if you need to. I also recommend placing the pastry on the plate you’ll be serving the cake on.
To make the filling look beautiful you can make rows with three dots as shown in the picture below. Start with one row, add a second, a third, and continue until your entire circle is covered.
After you’ve covered the bottom layer with the frosting, place the second layer on top and make rows with three dots until you’ve also covered the top with the frosting.
How to decorate the Vegan Cream Tart?
For this part, you can get as creative as you want or keep it simple. I decided to add pink roses, gold-covered chocolate strawberries, and raspberries. But you can also make the cake with different fruits as the roses and strawberries are a little more time-consuming.
I bought the roses 2 days in advance. Pick roses that are already a little open. I made the strawberries on the same day as the cake. The cake and strawberries will be fine after 24 hours. But the fresher the safer. I recommend making the cake the evening before you’re going to serve the cake.
For the Pastry For the cream frosting Decorations Tools Making the dough Making the circle shape Baking the pastry Making the cream frosting Piping the filling Decorate the cake
Vegan Cream Tart
Print
Ingredients
Instructions
In this recipe, I’ll show you how to make these super healthy stuffed zucchini boats. They are really easy to make and full of flavor. They are perfect if you’re looking for a low-calorie dish. But they can also be eaten with bread or pasta.
How to make the Zucchini Stuffing?
Start by washing and cooking the lentils. Cook the lentils for approximately 15 minutes in water until they become soft. The lentils are prone to boiling over. So make sure you keep an eye on the pan. Drain the lentils when they are done and set them aside.
Water Lentils Keep an eye on the lentils The lentils are ready when they are soft
When the lentils are cooked you can start making the sauce. First, put a little olive oil in a pan and bake the onion until it caramelizes. When the onion is caramelized you can add the minced garlic and bake one minute longer. Next, add the diced canned tomatoes, the lentils, and the spices. You can also add fresh tomatoes but canned tomatoes are a little earlier. Mix well and the sauce is ready!
Olive oil Onion Garlic Canned tomatoes Cooked lentils Spices
How to slice the Zucchini?
For the perfect zucchini boat, it is important to slice the zucchinis perfectly in half. This is not very hard to do. Just cut the stem off first and double-check if you’re putting the kife in the middle before you slice the zucchini. When you’ve sliced the zucchini in half you can remove the center with a small spoon.
Remove the stem Slice in half Remove center with spoon The result
Stuffing the Zucchini.
Fill each zucchini with the sauce. You can fill 3 zucchini with the sauce. Or make fewer zucchini’s and keep an extra sauce for pasta or bread on the side. Next, sprinkle your favorite vegan cheese on top of the sauce and zucchini.
Fill the zucchini Add cheese
How to bake the Zucchini?
Bake the zucchini at 175°C for 30 minutes or until the cheese has melted and the zucchini is cooked.
Eat the zucchini as a low-calorie dish. Or eat them with pasta or bread on the side.

Enjoy!
Vegan Stuffed Zucchini Boats
Print
Ingredients
Instructions
Vegan Tomato Tuna Sushi
In this recipe, I’ll show you how to make tuna sashimi from tomatoes. This is probably one of the most magical dishes you’ll ever make. Transforming a simple tomato into a beautiful sushi platter is so satisfying. Not only does it look like sushi but with the right flavors, it can also satisfy your sushi cravings.
How to make Tuna Sashimi from tomatoes?
The process to make sashimi from tomatoes may look more complicated than it actually is. The preparation only takes 15 minutes and no difficult techniques are required.
How to Blanche tomatoes for sashimi?
First, we’re going to balance the tomatoes to make them look like sashimi. Start removing the core from the tomatoes and make an X at the bottom with a knife.
Remove the core Make an X
Next, put the tomatoes in boiling water. And prepare an ice bath while you are waiting for the tomatoes to boil.
The tomatoes are ready when the skin is starting to loosen. This only takes a couple of minutes so keep an eye on the tomatoes. When the tomatoes are ready you can transfer them to the ice bath to stop the cooking process. This is important because you don’t want the tomatoes to become too soft.
Put the tomatoes aside and start working on the marinade.
How to make the marinade for the Vegan Tomato Sushi?
The marinade is an important step for vegan tomato sushi. The marinade will remove the sour flavor from the tomatoes and add a fishy flavor.
Start by warming 100ml water with one kombu sheet. Turn the heat down when the water is almost at its boiling point and wait for the kombu sheet to become soft and unfold. You don’t want to boil the kombu because this will affect the flavor. The kombu is an important ingredient to add the fishy flavor to the tomatoes. When the kombu is soft, you can transfer the kombu with the water to a container
100ml water Kombu The result
Next add the sake, soy sauce, mirin, rice vinegar, maple syrup, and olive oil. Mix and set aside.
Sake Soy Sauce Mirin Rice vinegar Maple Syrup Olive Oil
How to cut Tomatoes to look like Sashimi?
Take the tomatoes out of the ice bath and carefully remove the skin.
Peel carefully The skinned tomato
Slice the tomatoes into 4 parts. Be gentle with the tomatoes, you don’t want to smush them. Remove the seeds from each quarter and the piece of tomato sashimi will be ready!
Slice into 4 parts Remove seeds The finished sashimi
Marinating the Tomatoes to taste like Fish.
After you’ve sliced all the tomatoes it is time to marinade them. If you want you can crumble a nori sheet and add it to the marinade to add extra fish flavor. Crumble a part of the sheet first for the bottom. Next, layer the tomatoes on top and add another layer of nori. You can put all the tomato sashimi pieces in one container or place the marinade and the sashimi in separate containers.
Marinade for at least one hour.
Nori sheet Tomato Sashimi Another layer of nori marinade at least one hour
Which Sushi can you make with Tomato Tuna Sashimi?
Tomato Tuna Nigiri
The first sushi you can make with the tomato sashimi is a nigiri. This one is quite easy to make. Just take a little bit of sushi rice and shape it like shown below. Just make sure your hands are a little wet before you start. This will prevent the rice from sticking to your hands. Place one tomato sashimi on top and your nigiri is ready!
You can shape the tomato a little if the edges aren’t clean and add a small dot of wasabi for a sophisticated look.
Tomato Tuna Sashimi Bowl (Donburi)
The second dish is a Tuna Donburi which is a rice bowl and is super easy to make. Just scoop a bit of the sushi rice in a bowl, flatten the rice a little, and place the tomato sashimi on top. Garnish with avocado and sesame seeds.
Sush Rice Tomato Tuna Sashimi Garnish
Enjoy the bowl with soy sauce and wasabi.

If you like you can also combine the Tomato Tuna Sashimi with Bang Bang tofu. This will add extra protein to your meal and the flavors go really well together!

Tomato Tuna Tartare
The last dish is a tomato tuna tartare. This dish is especially nice to make if you have a couple of tomato sashimi’s that don’t look as pretty as the other pieces. You can just slice them into cubes, add a little vegan mayo and sriracha, and put them on a little bit of rice. A food ring can help if you want clean edges but it is not required. You can also shape the rice with your hands.
Vegan mayo Sriracha Shape the sushi rice Add sashimi Tartare Remove ring
Garnish with sesame seeds and avocado.
Blanche the tomatoes Make the Tomato Tuna Marinade Cut the tomatoes Marinade the tomatoes Make your favorite sushi. You can make a tuna nigiri, tuna donburi, or tuna tartare for example. But there are many other tuna sushi dishes you can recreate with this recipe. Enjoy!
Vegan Tomato Tuna Sushi
Print
Ingredients
Instructions
In this recipe, I’ll show you how to make this delicious crispy bang-bang tofu in 15 min. You only need a couple of ingredients and the flavor is so good that even a tofu skeptic will like this recipe. You can serve the bang-bang tofu as a side dish or make a delicious rice bowl.
How to make the tofu crispy?
To make the tofu really crispy we are going to coat firm tofu in a cornstarch mixture. If you like you can press the tofu before slicing to remove excess water. But if you want to speed up the process you can skip this step.
First, cut the tofu into cubes and mix 2 tbsp of cornstarch with 3 tbsp of water. Mix the cornstarch and water really well. When the cornstarch mixture is ready, you can add the tofu, mix, and make sure each tofu cube has a layer of the cornstarch mixture.
Dice the tofu Cornstarch + water Mix tofu with cornstarch
Next, you can add spices. I add paprika powder, garlic powder, salt, and pepper.
Add spices Mix
Next, we’re going to bake the tofu in neutral oil. The tofu should be ready in 10 minutes if you bake it on medium-high heat. Make sure to rotate the tofu while it’s baking to bake each side.
Bake on medium-high heat Rotate to bake each side
How to make the Bang Bang Sauce?
While the tofu is baking you can make the bang bang sauce. The bang-bang sauce is really easy to make. Just mix the vegan mayonnaise, sriracha sauce, and sweet chili sauce in a bowl. Taste to see if you like to add more sriracha.
How to make the Bang Bang Tofu?
When the tofu is ready you can mix the tofu and the bang bang sauce. Mix the tofu and the sauce before serving if you want to tofu to stray crispy. The sauce will make the crisps on the tofu soft if you mix them too early.
To mix the tofu with the sauce, you can put the tofu in the sauce bowl. I do this when I make a rice bowl. But if you’re not sure how much sauce you want. I recommend putting the sauce little by little on the tofu.
Garnish the bang-bang tofu with sesame seeds and spring onion.

And enjoy your bowl or side dish!

For the crispy tofu: For the bang bang sauce Extra Mix the sauce and the tofu right before serving to keep the tofu crispy.
Bang Bang Tofu
Print
Ingredients
Instructions
Notes
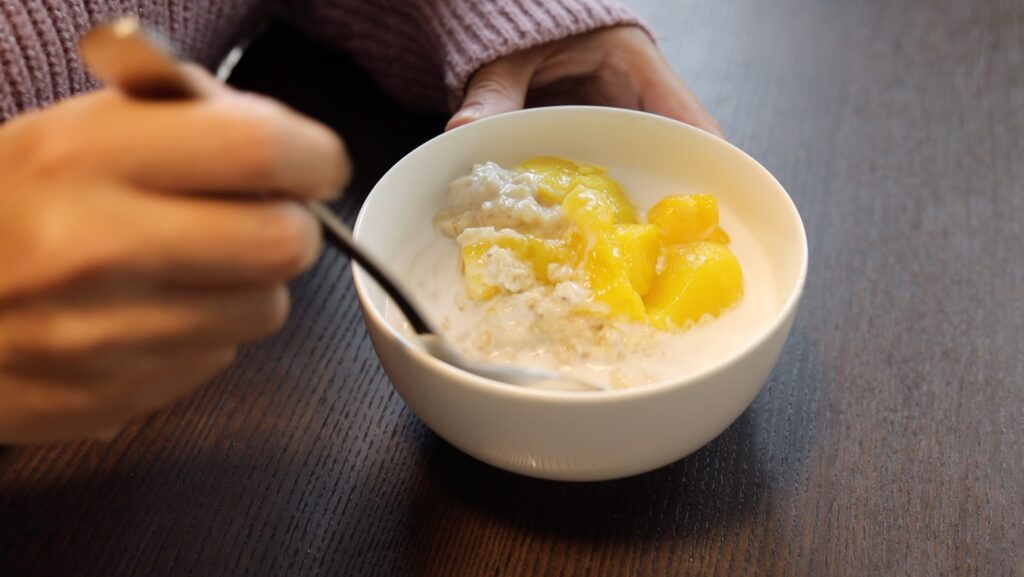
5 Minute Mango Coconut Oatmeal
In this recipe, I’ll show you how to make this super easy mango coconut oatmeal. I love eating oatmeal in the morning because it’s so versatile. You can make many different flavor combinations. This coconut mango is one of my favorites.
How to make oatmeal.
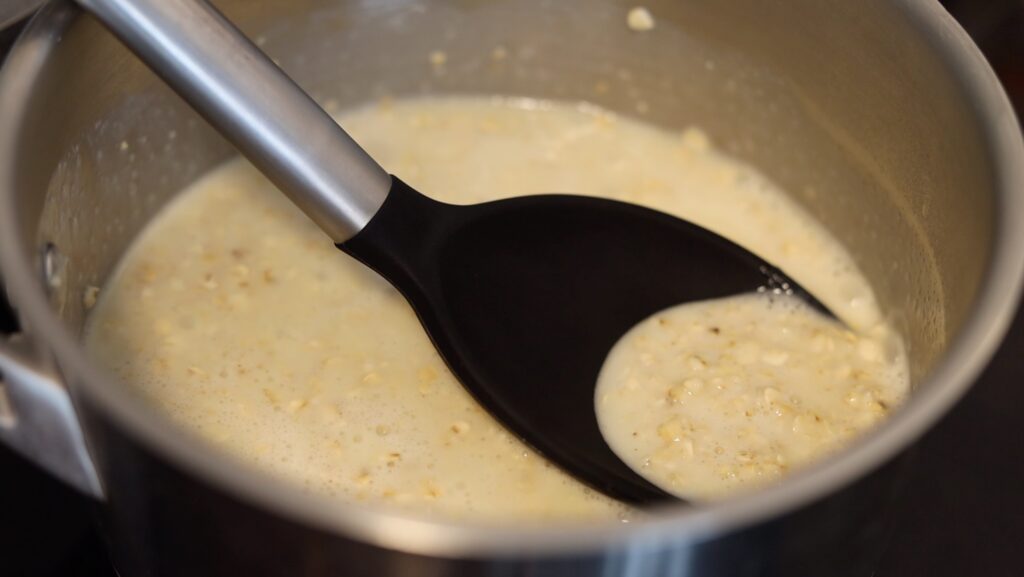
Oatmeal is very easy to make. You can make the oatmeal on the stove or in the microwave. For detailed instructions check my apple cinnamon oatmeal recipe over here.
How to make the Coconut Mango Oatmeal?
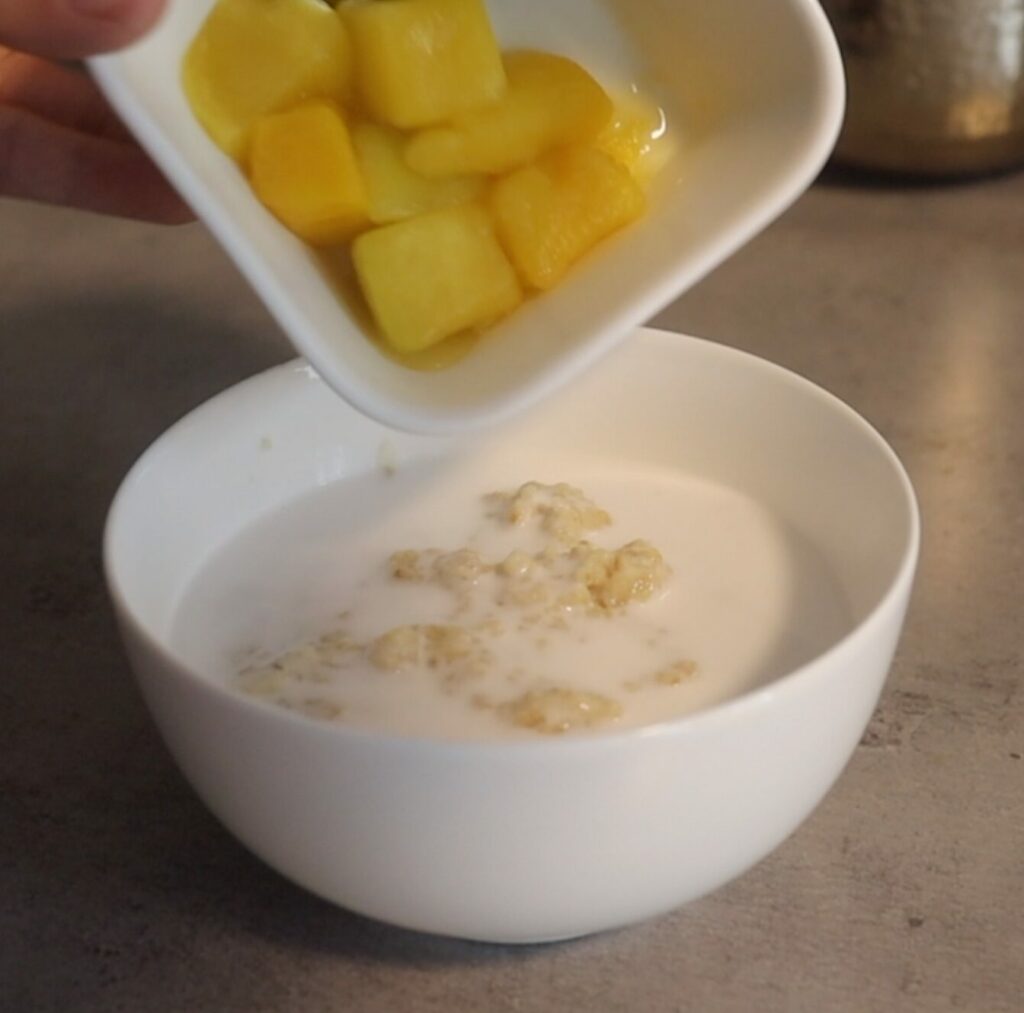
When the oatmeal is ready the only thing left is to add the coconut milk and the mango. You can add the coconut milk when the oatmeal is still in the pan or after you have put the oatmeal in a bowl. Add as much coconut milk as you like. I love coconut milk so I added a nice layer.
For the mango, you can use fresh mango or frozen mango. If you use frozen mango make sure that you thaw it before you put it in the bowl. Or cook it with oatmeal.
Last you can add some maple or agave syrup tho make the oatmeal a little sweeter. But depending on the sweetness of the mango this may not be neseccary.
Mix the ingredients and enjoy!

Enjoy!
Mango Coconut Oatmeal
Print
Ingredients
Instructions
In this recipe, I’ll show you how to make this super easy vegan tofu bowl with sesame garlic tofu. Make sure you keep these few ingredients in your pantry and you’ll always have an easy way to add extra flavor to your tofu.
How to make Sesame Garlic Tofu?
The first step to make the sesame garlic tofu is to coat the tofu in corn starch. You can slice the tofu in any way you like. I prefer cubes because they bake a little quicker.
Cornstarch Tofu
Bake the coated tofu in a little oil until it is crispy.
In the meantime make the sauce for the garlic sesame tofu by mixing the minced garlic, soy sauce, rice vinegar, vegetable bouillon, and agave syrup.
Minced Garlic Soy Sauce Rice Vinegar Vegartable Bouillon Agave Syrup
When the tofu is crispy you can add the sauce and cook the tofu in the sauce and sprinkle the sesame seeds on top. Cook the tofu in the sauce until the sauce thickens.
How to make the Vegan Tofu Bowl?
To make the bowl you can combine the sesame garlic tofu with rice and your favorite vegetable or any vegetable you have at home. I used broccoli and jasmine rice. But you can also get a little more creative and for example, use noodles instead of rice.

Enjoy!
Vegan Tofu Bowl with Sesame Garlic Tofu
Print
Ingredients
Instructions
In this recipe, I’ll show you how to make this healthy vegan potato tortilla. This recipe is inspired by the classic Spanish tortilla. But instead of the eggs, we’ll use chickpea flour. I also decided to add vegetables to make the tortilla more balanced. But you can always leave those our depending on your preferences.
How to make a vegan potato tortilla?
First, we’re going to prepare the ingredients. Peel and dice the potatoes, wash and cut the sweet long peppers (or other vegetables). And dice the garlic and onion.
Next put the potatoes in a pan with water and boil them for 15-20 minutes. Or until they are soft. In the meantime, you can bake the onion, garlic, and sweet long peppers in a little olive oil.
When the potatoes are boiling and the sweet long peppers are baking you can also make the “egg” mixture. But you can also do this when the potatoes and sweet long peppers are ready.
To make the egg mixture simply mix the chickpea flour with water. You can add any spices you like. I added salt and black pepper. If you want a flavor that is more similar to egg you can also add black salt. Mix until all the lumps are gone.
When the potatoes are ready, you can drain the water and put the potatoes in the pan with the sweet long peppers. You can bake the potatoes with the sweet long peppers if you like the potatoes to be crispy. But this is not mandatory.
Next, pour the chickpea “egg” mixture over the potatoes and sweet long peppers. Make sure the mixture is evenly divided and all the potatoes and sweet long peppers are covered.
Put a lid on the pan and bake the potato tortilla for another 15 minutes on low heat.
The tortilla is ready when all the edges are dry and don’t stick to the pan anymore. To remove the tortilla from the pan I use a large plate. I put the plate on top of the pan and flip the pan so the plate is on the bottom and the tortilla lands on the plate.
Garnish with parsley and enjoy! You can also eat the vegan potato tortilla with vegan mayonnaise.
Ingredients
Instructions
In this recipe, I will show you how to make these fun vegan hot chocolate bombs that melt and burst open when you pour hot milk into your cup. These hot cocoa bombs are perfect for a cute gift or a cold day during winter.
How to melt vegan chocolate for hot cocoa bombs?
There are a couple of ways to melt vegan chocolate. Two methods I regularly use are au bain-marie and in the microwave. For a small amount of chocolate, I will usually use the microwave. I melted these 5 pieces of chocolate for 1,5 minutes in the microwave and scooped the melted chocolate over the parts that were not melted yet. And for larger amounts, I usually use the au bain-marie method. So if you’re are going to make a lot of spheres you may want to melt the chocolate in a hot water bath (au bain-marie).
Which mould should I use for hot cocoa bombs?
Technically you can use anything with the correct shape that is resistant to the cold temperature of the freezer. My mold is actually a ball-shaped ice cube maker. The best thing would be to buy a silicone mold. The silicone is soft and therefore the cholate will be very easy to remove from the mold. But if you do not want to buy a mold you can also get creative and make one from aluminum foil or find an object that has a similar shape as I did.

How to make the sphere for the hot cocoa bombs?
To make the perfect sphere we’re going to coat the mold twice. First, add a thin layer of the melted chocolate that covers the entire mold and place it in the freezer for 5 minutes. After five minutes the first layer will have set and you can add a thin second layer. Freeze the chocolate for another 15 minutes and they’ll be completely ready to remove from the mold.
If you’re using a silicone mold you can directly remove the chocolate out of the mold after freezing. But if you are using a plastic mold you have to make sure that the mold looks white (left mold on the picture). If you can still clearly see the chocolate (right mold on the picture) you won’t be able to remove the chocolate from the mold. Because the chocolate is still stuck to the bottom.

If the mold doesn’t turn while you can gently press the sides of the mold a little until you see a small white spot. Be careful when you press, the chocolate can break if you use too much force. Once you have the white spot put it back in the freezer to loosen up completely. To remove the sphere gently move the chocolate up and down with your fingers and pull it out when it is moving.
Which vegan ingredients can Iuse for the hot cocoa bomb.
Marshmallows are the pretties to put in the hot cocoa bomb. Unfortunately, most marshmallows are not vegan. So if you want vegan marshmallows make sure you buy them ahead of time. I wasn’t able to get any vegan marshmallows because they were all sold out. I did find some vegan candy canes. Most candy canes use a red food coloring that isn’t vegan so make sure you check if they don’t contain E120. You can of course also just use vegan chocolate milk powder. Or make vegan chocolate milk powder as I did.
When you stuff the sphere make sure you place it on something that will keep it in place. The sphere will melt if you hold it in your hand. I put my sphere on a heart-shaped cookie cutter but many other things will work as well.
How to seal the sphere for the hot cocoa bombs?
To seal the sphere first take a second-half and melt the bottom a couple of seconds in a pan on low heat. Next place the second half on top of the first half. Seal the sphere with the melted chocolate. You can use your fingers or a toothpick to spread the chocolate.
How to decorate the vegan chocolate bombs?
You can go as crazy as you like with the decorations. Or keep them really simple. You can glue the decorations on the sphere with the melted chocolate. I coated a couple of larger candy cane pieces with edible gold and silver powder. And crushed a couple of candy canes to sprinkle them on top. A really cute look is also to use a piping bag and make lines on top of the spheres. Especially if you can find white vegan chocolate.
How to make hot cocoa with the chocolate bombs?
Once the hot cocoa bombs are ready the chocolate milk is really easy to make. Put a hot cocoa bomb in a glass and warm your favorite plant-based milk on the stove or microwave. You want the milk to be really hot.
Next, pour the hot plant-based milk on the sphere and watch it melt and pop open if you put vegan marshmallows inside.

Give it a good stir and enjoy your delicious vegan hot cocoa.

Ingredients
Instructions